
Is SharePoint a viable DAM solution?

Solutions
There are two solutions for this:- Asset Bank Publishing Functionality. This allows you to specify a set of assets in Asset Bank and choose to have these output to a publish location (via simple copy, FTP or SCP transfer methods). In addition, Asset Bank can be set up to generate a sensible folder structure (e.g. based on the product code) and automatically generate all of the sizes required. Your web team can then use this as a basis to automatically populate the product pages on your website.
- The Asset Bank API (Application Programmers Interface). This would allow your web development team to write code that would interface with your Asset Bank, find the relevant images (e.g. via the 'product code' attribute) and retrieve the different sized versions they need. More on the API.
Step 1:
The first thing to do is ensure you have an attribute set up that contains each items product code via the 'Admin > Attributes' area.
Step 2:
You would then go to 'Admin > Download Options'. Here you would create a new download usage type which will generate all of the image sizes requested by your web team, e.g.- large 1,200 x 1,200 RGB JPG
- meduim 800 x 800 RGB JPG
- small 400 x 400 RGB JPG
Step 3:
Finally, you would set up the Publishing Action that would output versions of the these images to the location of your choice. Fig 1. below shows you the options available.
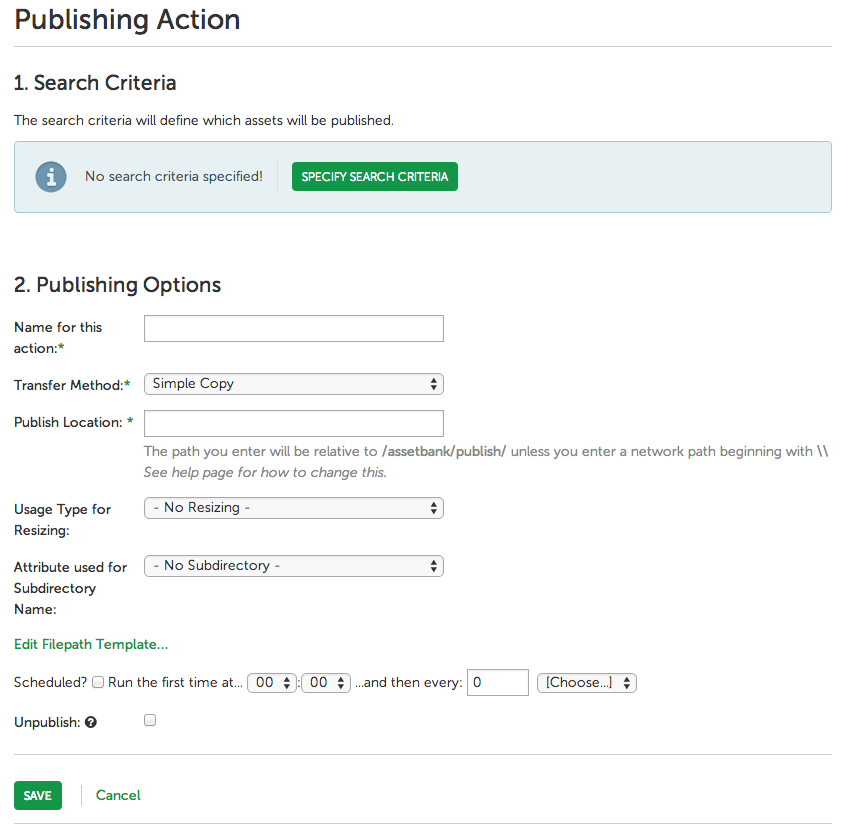
Fig 1. Setting up a Publishing Action in Asset Bank
Taking you through these options:
1/ Search Criteria: this allows you to specify the set of assets you want published. E.g. all assets marked with a specific 'product' access level tag.
2/ Publishing Options: here you can give your action a name, choose the transfer method (simple copy, ftp or scp <secure copy protocol>), specify the location you would like the files to end up in, choose the usage type from Step 2 to ensure the files you need are converted to the different sizes you require, select the attribute you would like to use for the folder names (here I would use the product code), select whether or not you would like this to run automatically each day or manually, and finally choose whether or not you would like any deletions in Asset Bank to be reflected when next you publish this set of assets (the Unpublish option).
The Result
Once completed and published, you will then have a folder structure that looks something like Fig. 2 below.
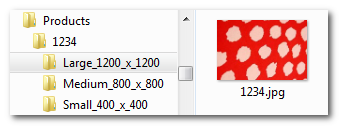
Fig 2. A folder structure created after an Asset Bank publish action
Here you will see that the product code is used as the folder name to group the images ('1234' is my example code), additional sub-folders have been created to match the size options set up in Step 2, and the product images themselves have been automatically converted, resized and placed into the relevant folders. This is now ready for your web team to use.
Summary
Centralising and managing your digital assets in a DAM system is only part of the story. Ensuring different sets of users can interact with these resources in the most efficient way possible is also another aspect. Here we have introduced two additional methods (Publish and API) and shown how the publishing mechanism can work to automatically generate a folder structure of assets ready for use on a website.
If you have any feedback or questions then please get in touch: feedback@bright-interactive.co.uk.
Thanks, Paul.


