Getting your Asset Bank live
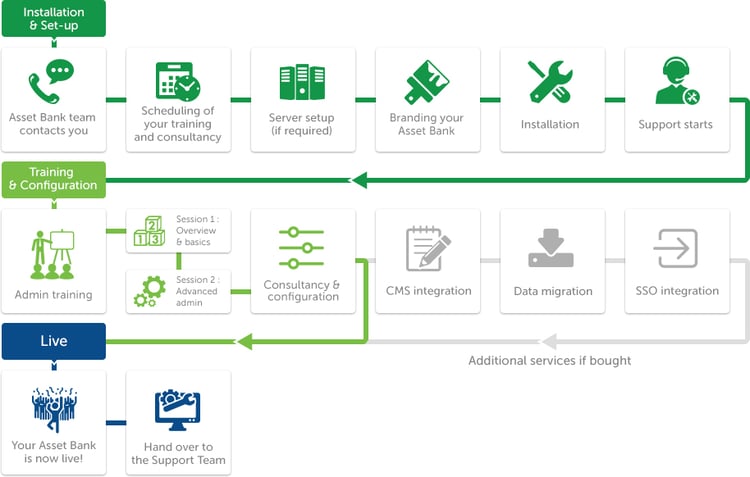
The ten steps to getting your Asset Bank live
1. Once you have sent us your signed agreement, we’ll contact you to kick things off.
2. We schedule your training and consultancy.
3. You get your server set up if required.
4. We skin your Asset Bank to match your branding.
5. Asset Bank is installed.
6. Your support agreement starts as you can now use your Asset Bank. We’re sure you’ll have questions!
7. Time for training. The first session gives an overview of Asset Bank and basic features, the second is for admins to learn how to manage Asset Bank for their organisation.
8. Consultancy and configuration to ensure your Asset Bank fits your organisational needs. If you have requested them, additional services and features are delivered, including CMS integration, data migration or SSO integration.
9. Your Asset Bank is now live.
10. Hand over to our customer support team.


